Configuring the Data Capture Settings
Configuring data capture affects the menu options for the other settings. To configure the data capture settings, follow these steps:
1.On the Overall Settings section of the DataCapture window, select Configuration. The system displays the Configuration window.

2.Select the configuration setting:
•Simple—permits easily selecting the most commonly used data capture settings.
•Advanced—provides you the functionality to select the specific tracing masks for data capture.
In most cases, Simple configuration provides the necessary options and is easier to use.
3.If you selected the Simple configuration, select Default Setting. The system displays the Default Setting window.
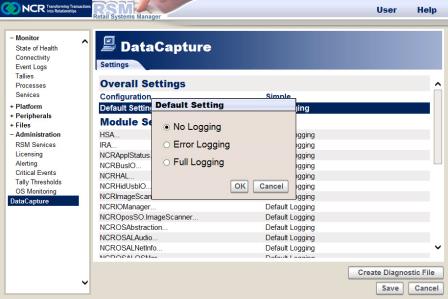
The Default Setting is the data capture mask used for all modules listed under Module Settings. These modules are configured for Default Logging.
a.Select the default setting, and then select OK.
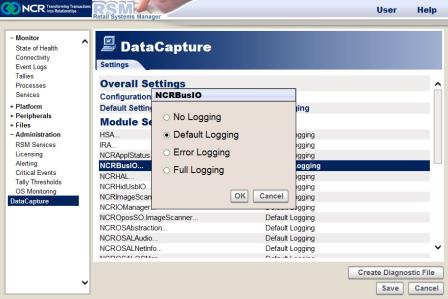
b.If you want to configure a module and set it to a logging that is different from the default setting, select the module and then select any of the following options:
4.If you selected the Advanced configuration, the DataCapture section additionally displays the Default Trace Mask and the Default Level Mask settings.
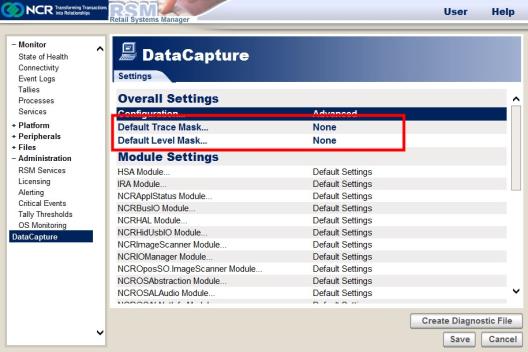
a.Select Default Trace Mask, and then select the trace mask settings from the default Trace Mask window.
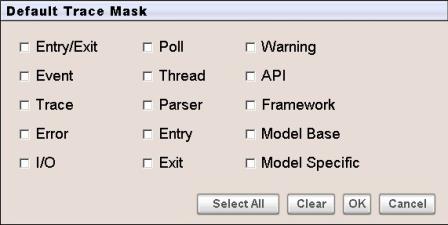
Note: You can select more than one trace mask.
b.Select OK.
c.Select Default Level Mask, and then select the level mask setting, whether All or None.
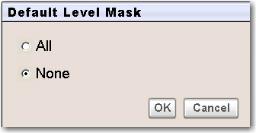
d.Select OK.
e.If you want to configure a module and set it to a setting that is different from the default setting, select the module and then select the desired setting.
5.Select Save in the DataCapture section to save the changes.